The Arduboy is a cute little credit-card sized Arduino-compatible with a 128x64 black and white OLED screen. It has 32kb of flash for program memory and 2560 bytes of RAM.
(N.B.: this is “reblogged” from my post on community.arduboy.com)
Over the Christmas break I put together a little demo which renders the Utah teapot (240 faces) at >30fps on the Arduboy, with 4x4 ordered dithering.
Source code is available on Github as usual.
I started off just rendering an octahedron, as it was simple and the faces were triangles instead of squares (usually I’d use a cube…). I got it working while on the train home and posted a quick video tweet:
Playing with an #arduboy on the train home, got subpixel dithered triangle renderer working pic.twitter.com/n5oYztuSHI
— Andy Sloane (@a1k0n) December 22, 2016
And then I extended it to an icosahedron (in spaaaaace!)…
@a1k0n now with more polygons, PWM dithered pixels, and fixed point math (no floats) pic.twitter.com/F1P00NeDiH
— Andy Sloane (@a1k0n) December 26, 2016
…but then Kevin Bates, the Arduboy creator, pushed me to do more.
@a1k0n I downloaded this and it looks even better in person. What are the odds for a teapot? 😊
— Kevin Bates (@bateskecom) December 22, 2016
That required doing a ton of optimization work, but I’m happy I persevered. In the course of this project, I ended up creating a bespoke statistical profiler which runs in a timer ISR and inspects the call stack, buffers it, and sends it over the USB serial port. I’ll get to that later.
Here’s how it works.
Polygon rendering
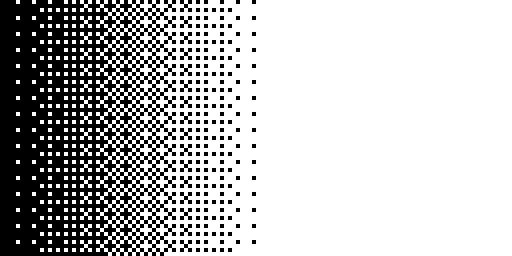
The arduboy screen is a 1024 byte array where each byte corresponds to eight vertically arranged pixels; you can think of it as 8 horizontal “banks” of 8 pixels tall, 128 pixels wide. Here are the addresses and masks of the pixels on the left side of the first two “banks”:
![]()
To make it fast, the triangle filler works in vertical stripes (instead of the more typical horizontal ones), and the inner loop can plot up to eight pixels at once just by writing a byte to memory and then moving down to the next “bank”. It’s no extra work to plot a dithered pattern; you just write a different byte value for each horizontal column (0x55, 0xaa, etc for a checkerboard).

slow motion triangle fill, one frame per byte written
Another important property to making this look good is that all screen coordinates are computed with sub-pixel accuracy (it’s 4 extra subpixel bits, so the real 128x64 screen becomes a virtual 2048x1024 one). The reason for this is that when plotting lines or triangles, the interior pixels covered by the triangle can change even if the vertices of the triangle map to the same pixels. So slow rotations make subtle changes to the shape of the outline and it really improves the overall aesthetic, which is super important at low resolutions.
![]()
left: subpixel accurate rendering; right: vertices clamped to integer coordinates
Compromising on rendering accuracy would speed things up a bit, but I’m unwilling to do that and I found better ways to optimize, though ultimately I did compromise precision in 3D coordinates.
Ordered dithering
I use the same 4x4 matrix as what’s on the wikipedia page, but converted into a 17-level lookup table (from pure black to 15 in-between levels to pure white). A few lines of numpy generate this.
3D math
The teapot has 137 vertices and 240 faces. Naïvely doing the rotation, projection and backface sorting on a microcontroller stretches the frame budget, even without rendering polygons.
The original octahedron used the AVR float library for all computations, and that ran pretty fast, but then I got a bit more ambitious and had to switch to fixed point math in order to render a teapot. I first did this in a straightforward way, using a lot of 32-bit integer multiplications instead of float multiplications.
However the profiler showed me I was basically spending all my time in the 32-bit multiply and divide routines.
Division is slow
The AVR does not have any efficient way to perform division – divides are super expensive. There were two places where division was heavily used: in the triangle filler, to determine line slopes, and in 3D perspective projection.
In the triangle filler, we’re making a relatively small adjustment and the
quotient shouldn’t be very large. I just replaced dy02 /= dx02; fy02 %= dx02;
with a subtraction loop:
  // unroll divmod here; this is sadly much faster
  while (fy02 >= dx02) { ++dy02; fy02 -= dx02; }
  while (fy02 <= -dx02) { --dy02; fy02 += dx02; }
For perspective projection, I decided to linearly approximate the division by z. This looks good enough for viewing a single object, but wouldn’t hold up to scrutiny if we were rendering a whole room. The computation to perform is to get the screen coordinates xs and ys from the object x, y, and z, plus a distance d between the camera and the object, and a scale factor k to account for the screen size and field of view.
\[x_s = f(z) = \frac{k x}{d - z}\]If we just take a linear Taylor expansion around \(z = 0\), we end up with:
\[x_s = f(0) + f'(0)\ z = \left(\frac{k}{d} + \frac{k}{d^2} z\right) x\]z, being an eight-bit signed object coordinate, ranges between -127 and +127. A d of 210 (i.e., 1024) gives a nice 3D effect given that z range without looking very distorted, and a scale factor of 220 puts the projection in roughly the correct range for our 1024-subpixel-unit tall display.
With these nice round numbers, it works out to \(x_s = (1024 + z)\ x\), which means we can just re-use that subexpression and multiply for y as well. Which is good, because…
Multiplication is fast
The AVR has a variety of 2-cycle 8x8 -> 16 multiply instructions, and it behooves us to make extensive use of that, rather than letting gcc generate calls to 32-bit multiply routines. Which means we need to reduce our precision, where possible, to 8 bits.
The first step in rendering (DrawObject if you’re looking at the code) is to create a rotation matrix; this is done with a 10-bit precision sine lookup table (another neat trick I discovered: 1024 * (sin(x) - x) is < 256 in the first quadrant, so a 10-bit precise sine LUT fits in 8 bits just by adding x back on), and some 32 bit math to construct a rotation matrix once up front, and then that matrix is quantized down to 8 bits. This is only done once per frame, so it’s not a big deal.
The object models are also quantized down to 8 bit coordinates with a little
python script
which takes an .obj format, rescales the model and quantizes to 8 bits, fuses
merged vertices, and also rescales / quantizes face normal vectors. Then the
rotation is a 3x3 8-bit matrix multiplied with an 8-bit 3-vector; the AVR has a
special instruction (fmuls) which will do a 1.7 signed fixed point
multiplication which is exactly what I needed, and is available in avr-gcc as
__builtin_avr_fmuls().
Then the vertices are projected with the Taylor expansion trick: \(\frac{2^{20} x}{2^{10} - z}\) is approximated as \(x \cdot (2^{10} + z)\) and it’s good enough for a 128x64 screen…
I still need to do 32-bit multiplications to check the face winding order (faces that have clockwise vertices are facing away from the camera, so are not rendered), since the vertices are 16-bits in precision: both because the subpixel screen grid is 2048x1024 but also because some vertices might be off-screen, and we still want to correctly clip the triangles if they are.
Face sorting
The teapot is not a convex object; if you render it without allowing for this, the knob at the top, the handle, or the spout will show through the object like a ghost, unless you either z-buffer (HA! too slow, not enough memory anyway) or draw the faces back-to-front.
I actually implemented a heap sort to do this, which worked perfectly on my computer but would crash on the AVR. Turns out, I’m completely out of memory. Between the frame buffer (1024 bytes), projected vertices (137*2*2 = 548 bytes), stack and other globals, I definitely don’t have another 377 bytes left (137 z coordinates, 240 face orders) to dynamically sort.
Instead, I pre-sort the faces, as I’m not hurting for flash space. The model comes with the faces “baked in” sorted by x, and also has auxiliary face orders sorted by y and z. At runtime, I figure out which axis is most facing toward (or away from) the camera, choose the face order from the lookup table (reversed if necessary), and render in that order. It’s close enough.
Profiling on Arduboy
I was surprised to find there’s no real decent arduino profiler option.
I ended up hacking together a statistical profiler on a timer interrupt which walks the stack:
static const size_t PROFILEBUFSIZ = 32;
static volatile uint8_t profilebuf_[PROFILEBUFSIZ];
static volatile uint8_t profileptr_ = 0;

ISR(TIMER4_OVF_vect) {
  if (profileptr_+2 <= PROFILEBUFSIZ) {
    uint8_t *profdata = profilebuf_ + profileptr_;
    // disassemble, count # pushes in prologue, add 1 to determine SP+x
    uint8_t *spdata = SP+17;  // pointer to data on stack when this ISR was hit
    profdata[1] = spdata[0];  // copy into profiling data buffer
    profdata[0] = spdata[1];
    profileptr_ += 2;
    for (uint8_t j = 2; j < 16 && profileptr_+2 < PROFILEBUFSIZ; j += 2) {
      // walk the stack and see if we have any return addresses available

      // subtract 2 words to get address of potential call instruction (opcode 0x940e);
      // attribute this sample to that instruction
      uint16_t stackvalue = (spdata[j] << 8) + spdata[j+1] - 2;
      if (stackvalue >= 0x4000  // is this a valid flash address?
          || pgm_read_word_near(stackvalue << 1) != 0x940e) {
        break;
      }
      profdata[j] = stackvalue & 255;
      profdata[j+1] = stackvalue >> 8;
      profdata[j-1] |= 0x80;  // add continuation bit on previous addr
      profileptr_ += 2;
    }
  }
}
I have to manually count the number of ‘push’ instructions in the generated assembly to figure out where the return address on the stack is to get it to work, but once it is working it loads a buffer with a stream of sampled addresses, which later in the code I stream out the USB port.
It also walks the stack a bit and probes the flash for anything that points to a CALL instruction; so that if, for instance, the avr-gcc multiply routine is interrupted, it can find the function which called it and attribute the sample to that function as well.
There is an auxiliary python script which collects the data from USB and saves the histogram out, and another one to annotate the disassembly with the histogram.
It’s not great, but it’s really really useful.
Future work
The Arduboy is a really constrained platform – 128x64 black and white graphics, only 2560 bytes of RAM, no dedicated graphics hardware – which is somewhat mitigated, compared to true retro platforms, by having a 16MHz CPU. Just because of the resolution I don’t think we’ll see much 3D on it, but it was fun to get it to work anyway.